Thursday, November 25, 2010

Tilda under Mistletoe

Good Morning and welcome to the final round of the Magnolia-licious Christmas All Year Long Blog Hop.


I finally have my computer up and running and have added a few new Magnolia stamps to my collection so I was thrilled to be able to participate this month!

If you've arrived here from Jessica Hammond's Blog, you're in the right spot and from here you will head right over to see a wonderful creation by Kathy Curry.

My entry for today uses Tilda under the Mistletoe - one of my very favorite Christmas images.


I found some beautiful new Christmas papers from Echo Park and paired it with some Crimson and Cream Bazzill card stock. I haven't made an easel card in a very long time so this was the perfect chance to go and pull out the directions for this style of card.


And here's a little side view:


Here is a list of the Copic colors used on my card:
E00, E0000, E25, E31, E33, E35, C1, R20, R35, YG93, YG95, B0000.

Thanks so very much for hopping by and I hope you have a wonderful Turkey Day!

Julie

Wednesday, November 3, 2010

My computer crashed

Wouldn't you know that as soon as I start posting on my BLOG, my computer crashes. I guess I'll have some uninterrupted stamping time. I'll be back when my computer returns from the "land of the lost"!

See you soon.
Julie

Sunday, October 31, 2010

Happy Halloween!

Good Afternoon and Happy Halloween!

I'm so excited to get back to my Magnolia stamps! They are one of my true obsessions. Just look at that sweet little face!

This is "Lovely Tilda" from the Autumn/Fall Collection and she was a "must have" as soon as I saw her.


I've used some gorgeous paper from Teresa Collins called "Giving Thanks" and black and orange Bazzill card stock. The flowers are cut from the same Teresa Collins paper using one of the Tim Holtz flower dies and the May Arts Black stitched ribbon is one of my all time favorites!
She is all dressed up for Halloween in her little orange dress.
Here is a list of the Copic colors used: E0000, E00, YR14, Y38, Y32, E31, E25, E50 and 0.

My final Halloween project is another image from the "Be Very Scared" Penny Black stamp set. I didn't even get to ink up every image in that set...I guess there is always next Halloween.


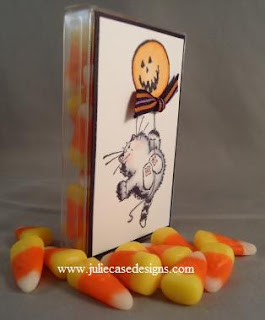
The kitten and balloon are colored with Copic markers. I've matted the image with some black card stock and adhered it to an acetate box that is filled with Candy Corn.

Here is a side view of the project complete with candy corn!

Thanks so much for stopping by.
Have a great Halloween!

Julie

Saturday, October 30, 2010

Penny Black Halloween

Hello Again!

I'm back again with three Halloween cards that are all made using the Penny Black Transparent stamp set called "Be Very Scared". This is such a great collection of images because every single image is absolutely adorable! Just take a peek at these little cuties!

First is the Kitty in the Pumpkin:
I've used White, Black and Orange Bazzill card stock, my large Marvy circle punches, the Cuttlebug Divine Swirls embossing folder, a white gel pen and my Copic markers. This is such an adorable little kitten:-)


Second is the Mouse with the Broomstick:
I must admit that I bought the stamp set for this image alone, but instantly realized that I liked every image in the set. I've used some Reminisce Halloween Argyle paper, Black & Orange card stock, Black May Arts ribbon and my Copic markers to color the image.


And the third image is the Vampire Kitty!
He's super easy to color with Copic markers because his cape is already stamped black. I found this beautiful candy corn paper from K&Company and paired it with the same Black and Orange Bazzill card stock I've used on the other cards. I've airbrushed a soft background on my white card stock using the Copic airbrush system.


The "Trick or Treat" sentiment stamp is from a separate Penny Black transparent stamp set called "Trick or Treat". I think that little spider hanging from the word "Trick" adds just the perfect touch.

Thanks again for popping by. I'll be back tomorrow with a final couple of Halloween projects!

Julie

Witches Shoes

Good Morning and Happy Almost Halloween!

It is such a gorgeous Fall day. I'm hoping that the weather holds for all of those little Trick-or-Treaters that will be out tomorrow evening.


I really love this stamp from Stampendous called "Witches Shoes". It's sweet and simple and so easy to color. The orange paper is in the first card is by Echo Park. The dotted green paper used in the second card is from the "Booville" line by Little Yellow Bicycle.

The "Trick or Treat" sentiment is from a Penny Black stamp set. You may notice the tiny spider hanging from this sentiment. I popped a tiny black gem on top of the stamped spider. Just gotta love that itsy bitsy spider!

Thanks so much for stopping by!
Julie

Friday, October 29, 2010

Give Me Your Candy...or Else

I'm Back....Just in time for Halloween!


It's been so long since I've posted anything...and now Halloween is just a few days away.

I couldn't let Halloween pass by without posting a few new projects on my much-neglected BLOG so I grabbed my camera and a few of the Halloween projects I've been working on and headed over to my little photo cube.

I'm starting tonight with a couple of sweet little Halloween treats.

This adorable little Vampire image is from Stampendous. He is colored with Copics and adhered to a small treat holder that is just the right size for a snack-sized package of M&M's. Here's a side view with the M&M package nestled safely inside.


The paper is from the "Booville" collection by Little Yellow Bicycle. The BAT trim at the top of the treat is a Black Satin trim from May Arts. I've used it here to decorate the top of the bag as well as hide the small staple that is holding my treat closed.

The treat bag is made from a strip of paper measuring 3x12; then scored at 4 1/2, 6 1/2 and 11. As you fold the top 1" flap over the top, you can simply staple the treat closed.

And here are the Copic Colors: C7, C5, C3, YG01, YG03, E0000, E00, YR04, Y38

Thanks so much for stopping by!
Julie

Monday, April 19, 2010

Fudge Cupcake Recipe for You

Good Afternoon!

I have such a special treat for you today....FUDGE CUPCAKES!!!


I teach a recipe class at the Scrapbook Page in Shawnee Kansas every month. The girls in the class submit recipes throughout the year and then I select 8 recipes every month and design a special recipe page. Each page measures 8 1/2 x 5 1/2 and fits perfectly in a leather bound album made by "WeR".

We meet one Sunday afternoon a month, create all 8 recipes pages and sample a few recipes too! This class has been taking place for nearly 2 1/2 years so I have over 200 of these fabulous recipes in my collection. Aren't I a lucky girl!! I now have SIX albums filled with tried and true favorites that I can turn to whenever I need a great recipe!

This month was extra special because we sampled two fabulous treats!

The first recipe was submitted by Emily Brown and it was a HUGE hit!
Take a look at these chocolate goodies! Delicious little brownies in a cupcake wrapper, frosted with chocolate icing and topped with a few sprinkles of pink sugar. Thanks Emily for a great recipe!!

Here's a copy of the recipe page we made in class. It doesn't get much better than chocolate and scrappin'!

We used some beautiful pink and chocolate paper from Pebbles along with some Bazzill card stock. The upper strip of brown card stock is punched using a Martha Stewart doily border punch. A thin strip of sheer dotted pink ribbon wraps around the page at the top.

Here's a copy of the recipe if you're interested in trying them for yourself. I used pecans for this recipe. I frosted my Brownie Cupcakes even though the recipe didn't call for that. Can you really ever have too much chocolate??


I forgot to take a picture of the second recipe we sampled in class...Blueberry Breakfast Bake! Another fantastic recipe!! However... I'm making that dish tonight and will take a quick picture in the morning to share!

Thanks so much for stopping by!

Julie

Thursday, April 15, 2010

Spring Kit and Friday Sketchers

Good Evening!

I spent some time with the new Magnolia Spring Kit today...what a lovely way to spend the day!! I am thrilled with all of the images included in the kit.

Here's a little close up of one of the new Tilda images. Isn't she just gorgeous??


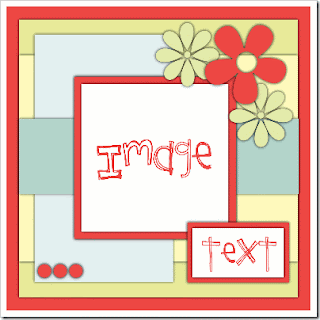
I've created my card today using a sketch over at the Friday Sketchers Challenge blog. It looks like I've finished just in time to be able to enter this card in challenge #97. I've included the gorgeous sketch below which was designed by Beatrix.

I'm using the remaining pieces of my Basic Grey paper left over from yesterday's card. Once again, the papers are from the Sugared collection. I've added some light pink chandelier glass garland that I purchased over at the Magnolia-Licious store. The wired glass garland is absolutely beautiful and really easy to work with!! I've unwrapped a couple of wired strands and twisted them around my flower.

The flower is created by layering lots of silk petals from a floral stem I bought at Michael's. The petals are all held together with a rhinestone brad. The ribbon is a wide Chocolate Satin from Stampin Up!

Here is a list of the Copic Colors:
Y11, Y21, Y26, E0000, E00, YG63, RV0000, RV00, RV10, RV21, RV23, RV25, 0
(Normally I use E000 instead of E0000 but I'm waiting for my reinker to arrive so I'm subbing the lighter color.)
Her cheeks are blushed with a little pink chalk.

Thanks so much for stopping by!
Julie

Wednesday, April 14, 2010

Tilda from the new Spring Kit

What a great day!

The new Magnolia Spring kit arrived today! These kits are sent out 4 times a year and all of the images are kept secret until they arrive in the mailbox. I have been stalking the mailman since I heard that kits were arriving in the US! I am so glad the wait is over.

The images arrive as just sheets of rubber so I grabbed my EZ Mount, mounted & trimmed the images and created my very first card using a stamp from this gorgeous new stamp kit!! The images are adorable! I wish I could just shut my door and stamp for the next few days!!

I found a beautiful sketch over at the Basic Grey Challenge blog and dug through my stash of Basic Grey papers and scraps. I've included the sketch designed by Martine for week 17 below.

And here's my take on the sketch.


I subbed out the flowers for some beautiful wide Pink grosgrain ribbon to match the ribbon in Tilda's hair. Both of the patterned papers are from the Basic Grey "Sugared" collection. The papers are named Delectable and Luscious. Pink & Chocolate is my all time favorite color combination so I LOVE these papers.

The Brown card stock is Bazzill, the small brads are from Making Memories. The sentiment and Chocolate satin ribbon are both from Stampin' Up! I've also used my SU ticket corner punch on the stamped images. I love that little notch snipped out of the corner.

Here is a list of my Copic Colors:
Y11, Y21, Y26, E000, E00, RV0000, RV00, RV10, 0

Thanks so much for stopping by and following my blog!
Julie

Tuesday, April 13, 2010

Obsessed with Digital Images!

Good Morning!

I finished my remaining two remaining cards late last night! I just couldn't put my markers away! These cards will complete my set of 4 coordinating cards using my new digital images from All That Scraps and some fun Doodlebug paper in lime and pink. If you scroll down to my previous post, you'll find the first two cards.

The first card is a perfect fit for a creative challenge over at Susie's Sassy Designs. This is their final challenge and the theme is Me and My Pet. The name of this digital image is "Puppy Kiki La Rue" and I think she is totally adorable with her little friend.

The second card uses the image "Polka Dot Emma". I just love this little polka dot bikini ~ what a cutie!!

I've used the same basic Copic colors on all 4 cards. Here's a few details:
Hair: Y11, Y21, Y26
Clothes: RV10, RV13, Y0G01, YG03
Skin: E0000 and E00 (My E000 ran dry so I had to improvise!)
Cheeks: pink chalk
Puppy: E31, E33, E35

And here's a quick look at all 4 cards. You'll find more info about the previous two cards in yesterday's post:-)

Thanks so much for stopping by and have a great day!
Julie

Monday, April 12, 2010

Good Evening!

I couldn't wait to spend a little time this evening with the digital images I purchased from All That Scraps! I'm planning to make a set of 4 coordinating cards using 4 of my new digi images.
I have the first two cards finished and will complete the other two cards in the morning but I just couldn't wait to post these tonight:-)


The first card uses the digital image "Cupcake Kiki La Rue". Isn't she adorable with her cupcake? The sentiment is computer generated using Microsoft Publisher. I wanted a small sentiment that would fit in a circle punch and none of my stamps were quite the right size.
Here are the Copic Colors for card #1:
Y11, Y21, Y26, RV10, RV13, YG01, YG03, E31, E25, E29


The second card uses the image "Spring Birgitta".

We have a sweet little white bunny of our own so I knew that I had to have this adorable image of Birgitta and her bunny.
Here are the Copic colors for card #2:
Y11, Y21, Y26, RV10, RV13, B000, C1

]The card stock for both cards is Pixie Pink from Stampin' Up and the lime & pink paper is "Cherry Cobbler" from Doodlebug.

Thanks so much for stopping by. I'll post the remaining 2 cards tomorrow morning:-)

Julie

Friday, April 9, 2010

Sunflower Birgitta

Good Evening!
Oh my Goodness!! I FINALLY purchased my first digi images!

I have seen all of the incredible digital images on-line but I have been too afraid to order them. Here were my top 3 fears about digital images:
A. I wouldn't be able to download the images (or find them after downloading)
B. I wouldn't be able to easily resize the images for my projects
C. My printer ink would smear when I colored with my Copic markers.

However, there were so many beautiful images calling my name...so...

I sent a quick email to Christine at All That Scraps asking for a Digi Image Test so that I could give it a try. And within just a few minutes, I had a sample image. I downloaded the sample image and after testing my printer ink, I went immediately back to store to shop!!!

I purchased several images, downloaded them and popped them into my Microsoft Publisher program where I could easily resize the images and put multiple images on a page to print.


I bought this little cutie (Swiss Pixie Birgitta) from All That Scraps and quickly put together a couple of cards. Since we live in the state of Kansas (the Sunflower State) I started with this image first. It worked and I am THRILLED!! Talk about immediate gratification. You place the order and POOF!!! The images are ready to download, print and color within minutes.

Here are my Copic Colors:
E000, E00, E31, E33, E35, E37, E47, Y11, Y15, R35, YG63, YG67, B0000, C1, 0

I think I will just lock myself up in my craft room this weekend with my new images!!
Thanks for stopping by and following my blog!
Juie

Wednesday, April 7, 2010

Kitchen Tilda and a Recipe

Good Morning!

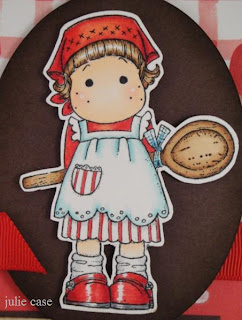
I finally had a chance to ink up this adorable Magnolia Kitchen Tilda and couldn't wait to use her for a recipe page!


I teach monthly recipe classes at the Scrapbook Page in Shawnee Kansas. The recipes are submitted in advance by the girls who take the classes so I have lots of fantastic recipes to choose from each month when designing the pages. And of course a recipe class wouldn't be complete without a few samples of the featured recipes. Snacking and stamping...What a great way to spend the afternoon!!


Each page measures 8 1/2 x 5 1/2 and contains one of the recipes that the girls have submitted. "WeR" makes these beautiful leather albums with page protectors which are just the perfect size for these pages. Each page can be placed in a page protector to keep it safe when cooking in the kitchen! I used my Silhouette digital cutter to cut the flourish from some black vinyl and adhered the flourishes to the side of my albums.

The beautiful cherry paper is from Creative Imaginations - cherries on one side and red with white dots on the other. The Chocolate Chip card stock and 5/8" Red grosgrain ribbon are both from Stampin' Up!
Tilda is colored with the following Copic Markers:
B00, B000, R32, R35, R37, E000, E00, E31, E33, E35, C1, C5, 0

Here's a close-up view of the super easy recipe!!


Have a great day and thanks so much for stopping by!
Julie

Tuesday, March 30, 2010

Another Sweet Bunny

Good Morning!

I'm back with another image from the "Carrot Bunny" clear stamp set by Inky Antics. (If you scroll down to my previous post, you'll find another card using a different bunny from this same stamp set.) The set includes 2 bunnies, 4 sentiments and a bunch of little carrots...all totally adorable!!

I've colored the bunny in shades of brown today. In my previous post, you'll find that the large rabbit is white. I'm trying out different colors using my Copic markers.

This is another card sample from my upcoming Copic class at the Scrapbook Page. The layout is simple so that we have lots of time to color our images. The card stock is Bazzill Red and the beautiful plaid paper is Hippity Hoppity Wicker from WeR. I've given the plaid paper a simple punched edge using a Martha Stewart doily border punch.

Thanks for stopping by!
Julie

Monday, March 29, 2010

A Big Bunny Hug

Good Morning!

For my card today I'm using an absolutely adorable stamp from Inky Antics! This large bunny is just one image in the clear stamp set called "Carrot Bunny". The set includes 2 bunnies, 4 sentiments and a bunch of little carrots. I'll be posting another sample using this same set tomorrow!

Here is the greeting I chose for the inside of the card. Gotta Love It!!


I apologize that my photograph doesn't show all of the copic coloring very well. The large white bunny is actually shaded with a C1 marker. I've used some pink chalk to give his cheeks some rosy color and to color the inside of the ears.

For the large carrot, I wanted to try a fun technique using the Copic colorless blender solution. (We were shown this technique in the Copic Certification class I took last Fall.) I colored the carrot with my copic markers first. Next, I dabbed some colorless blender solution on a small scrap of cloth and then lightly touched the cloth to the carrot. It left the texture from my cloth on the carrot.


This is one of the 5 cards we'll be making in my upcoming Copic class at the Scrapbook Page. The card design is very simple so that we plenty of time to color all of our images in class. The orange card stock is embossed with the Divine Swirls Cuttlebug embossing folder just to give this little cutie some texture.

We have a cute little white bunny of our own named "Mr. Bunz" so I just had to snap a few pictures of our little furry friend. He's a little Mini Rex and super cute and cuddly!

Thanks so much for stopping by!
Julie

Thursday, March 25, 2010

Magnolia-licious March Christmas Blog Hop


Good Morning and Welcome to my stop on the Magnolia-licious Christmas All Year Long Blog Hop! I'm so excited to be participating this month! This hop will happen the 25th of every month and I'm sure you'll find lots of gorgeous samples as you make your way from blog to blog!

If you've arrived here from Jessica's Blog you're in the right place. If you would like to start at the beginning of our hop, please begin with Julie Glasgow.

For my card today I'm using Tilda with the Violin. This was a wonderful surprise gift from Diana at the Magnolia-licious store when I placed my last order. I taught vocal music for 14 years with the Millard Public Schools in Omaha Nebraska, and so this little musician was a special treat!

I've chosen some Basic Grey paper from the "Wassail" collection for my card this month. (I had just enough scraps left from previous projects!) The card stock is Stampin' Up Always Artichoke and it was a perfect match to the Basic Grey patterned paper.

I've added a little Doodlebug Sugar coated glitter to her wings for a little Christmas sparkle!


The sentiment is from the SU set named "Scenic Season". All the paper is sponged with a little SU Creamy Caramel ink.


Tilda is colored with Copic markers.

You're next stop on the February Christmas hop is Kathy!
Enjoy your visits and thanks so much for hopping by,
Julie


Sunday, March 21, 2010

Tilda with her kitty


Good Afternoon,

We had a strange first day of Spring yesterday with 6 inches of snow! Today, the snow is melting but it still feels like Winter! Just a perfect weekend to stay inside and stamp:-)

My card today is using a "new to me" Magnolia stamp. The name of the stamp is "Tilda with cat hanging in her arms" - That's a mouthful!! I'm wishing for some Spring Time weather so I've pulled out the Pastels this weekend. This card uses some Tea Party designer paper from my Stampin' Up stash as well as some Bashful Blue and White card stock.


The ribbon is some gorgeous 1 1/4" Pink Grosgrain SU! ribbon that I used for the first time. I have a bad habit of hoarding the "good stuff" and setting it aside for just the right project. Because of this, I end up with a lot of unopened packages just waiting to be used! But I'm changing my bad habits!!

I've actually opened the package and used the Light Pink Chandelier Glass Garland that arrived in my mailbox on Friday! I ordered a strand of this garland along with some Magnolia stamps over at the Magnolia-licious store. The glass beads were so beautiful that I simply couldn't put them in a drawer. I've tried to get a close up of the beads in the picture below!


Here is a list of the Copic colors:
RV0000, RV000, RV10, B0000, B21, E000, E00, E31, E33, E35, and E50.
I've used a little pink chalk for the blush on the cheeks of both Tilda and her cat.

Thanks so much for stopping by!
Julie